
There are multiple ways to enter expenses in Squava. This article covers the options available for recording reimbursable employee expenses, such as mileage, or project-related charges that are not reimbursable, such as copies or permit fees.
After creating an expense, you can also attach receipts and supporting documents. See Expense Attachments for instructions on uploading and managing attachments.
In-Depth Step-By-Step Guide:
Option # 1: Enter Expenses Through the Expense Page
-
Begin entering your expenses by clicking on the Mega Menu (9 dots) → Expense.
NOTE: The date will default to today's date, but you can edit it to whatever date you need. -
Remember to type in the applicable date associated with your expenses. Click the 'Expense' drop down menu to select the applicable project or overhead category.
In this example, we are going to log an expense for mileage and copies. Enter all of the information, and be sure to click 'Save' before leaving the page. When you are ready to submit your expenses for reimbursement and apply them to projects, click the green 'Submit' button. The expenses in your list will be added to a bill in accounts payable for approval and payment, and will no longer be editable from this page unless they are returned to you from the bill SQUAVA will create.NOTE: When you are first creating your budget for the project, you will need to add any applicable expense categories, which will allow you to choose them from the 'Expense' drop-down menu on this page when you select the applicable project.
Need to attach a receipt or other supporting document? After saving your expense, you can upload files using the attachment feature. For step-by-step instructions, see Expense Attachments.
If you need to enter expenses related to sub-consultants or other company-related items like rent, software, or office supplies, check out our Help Articles for entering bills - Accounts Payable or adding bank or credit card transactions - Bank and Credit Card Registers.
Option #2: Add Expenses While Entering Timesheets
-
These steps demonstrate another way to log an expense using a convenient shortcut method.
To begin, open the Mega Menu (9 dots) → Timesheets. Before entering the expense, make sure you are viewing the correct week associated with the expense item.
- This shortcut will allow you to log an expense at the same time you are logging your hours. When you do this, it'll already know which date and project the expense item is associated with since you're already logging time for that particular date and project.
To do this, simply click the dots on the left of the time entry box and select +Add Expense.
-
When you click on the '+Add Expense, a new window will appear for you to log your expense information. As you can see, it already has the date and project pre-filled for you. Enter in the required information, and click 'Save' when finished.
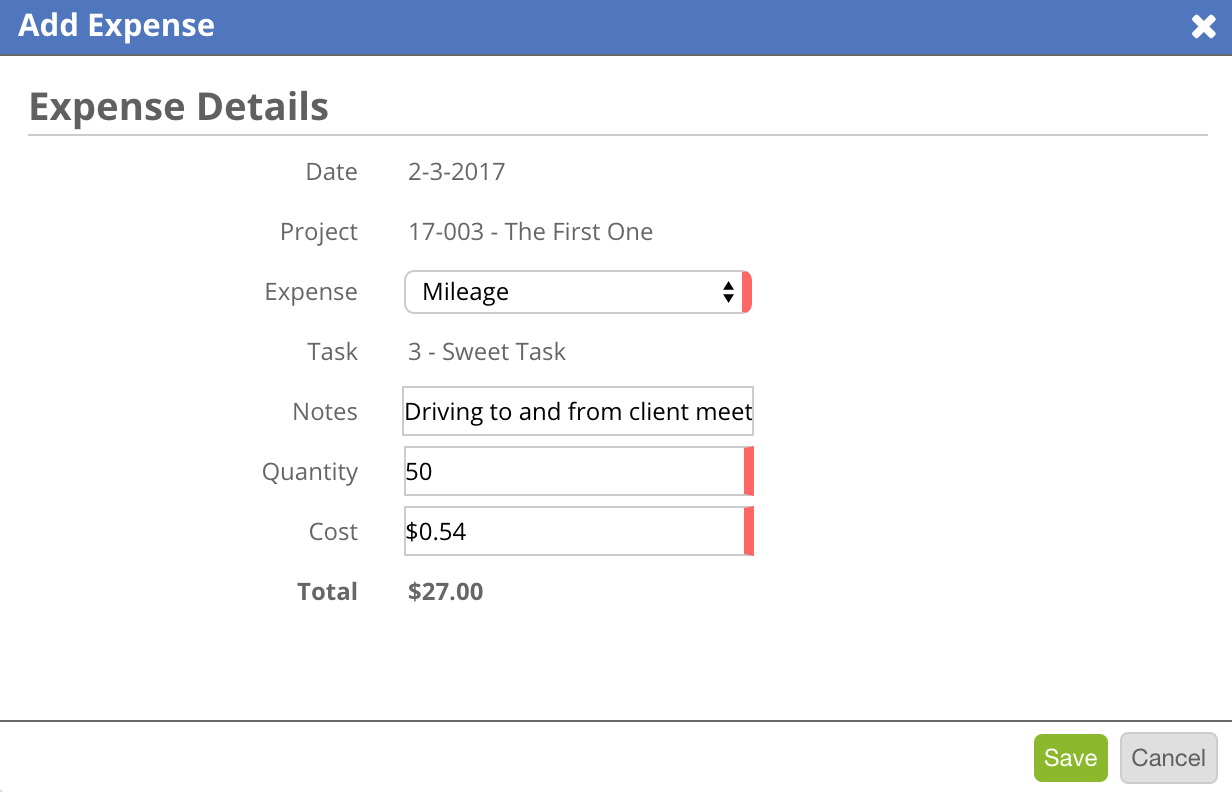
NOTE: Remember, when you are first creating your budget for the project, you will need to add any applicable expense categories, which will allow you to choose them from the 'Expense' drop-down menu on this page when you select the applicable project. -
This expense will now show up in your list of expenses on the Expenses tab where you first learned how to enter expenses above. Expenses must be submitted from your expense page in order to show up on project budgets and draft invoices. Please refer to the previous section (here) for instructions on how to submit expenses or enter other types of expenses.
NOTE: If your organization requires receipts or supporting documents, you can attach them after the expense has been created. See Expense Attachments for more information.
SUCCESS!!!
- Next, you will need to learn how to approve and pay the bill that was created when the expenses were submitted. Check out the Help Article for processing bills - Accounts Payable.
Comments
0 comments
Please sign in to leave a comment.